Google Ads For Photographers
Alright, today we are going to create a huge guide packed with tons of practical info. Google Ads is a hugely underutilized instrument in the photography industry. Especially among Wedding Photographers, you are rarely advised to use Google Ads. Almost all the advice centers around organically driving traffic. However, this is a significant mistake, in my opinion, and one that the savvy photographer, whether a wedding photographer or otherwise, can take great advantage of.
What is Google Ads?
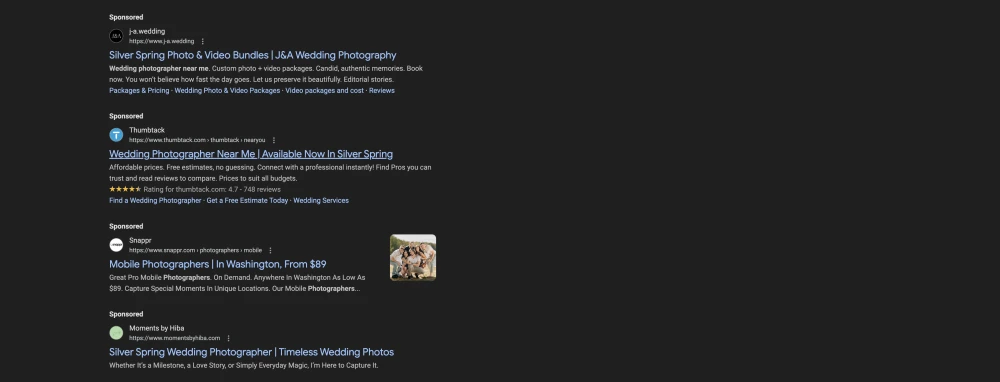
Let's start with this fundamental question. What is Google Ads? Google Ads encompasses advertising across all of Google's platforms, including YouTube, Google.com, Gmail, etc. What we will focus on today, though, is Google Search Ads. These are the Ads that show up at the top of the search results when you search for a term on Google. As an example, if I search for "Wedding Photographers Near Me" this is what shows up at the top:
Why Would I Want To Use Google Ads?
Using Google Ads comes down to one thing. Can I spend x to advertise and earn y in return? If y is greater than x, then Ads are going to be worth it. If not, then you are losing money. This is Google's entire business model (or at least their core business model). With that in mind, let's take a look at an Ads campaign from the proverbial 10,000-foot view and see how the financials work out.
Financial Models For Google Ads
Understanding the financial model for your business and how Google Ads fits into that model is the first and most crucial step of setting up Google Ads.
First, it is imperative to understand your own business and cost structure. Let's say, for instance, that you are a wedding photographer and you charge $3,000 per wedding. You will have certain costs such as insurance, website maintenance, rent, electricity, gas to drive to the shoot location, etc, that eat into that $3,000 before you can get to profit, but for sake of argument, let's say that after expenses on a wedding, you end up with $2,000 in profit. So, each additional wedding you shoot brings an extra $ 2,000 into your pocket.
Now, the question is - Can you run Ads and book enough photography gigs to make the ad spend worthwhile? Below is a sample breakdown of how this might look for a photography business.
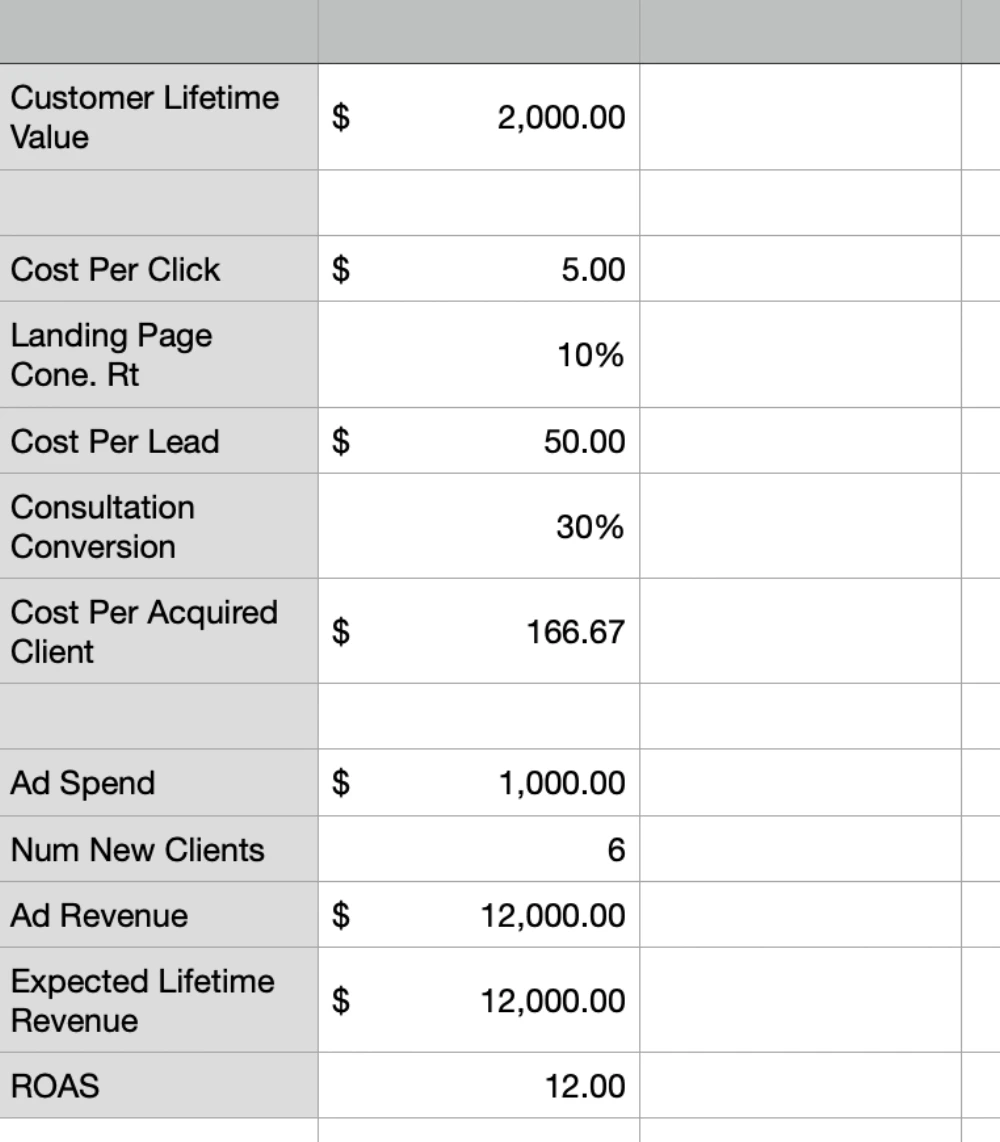
In the first column, we have the customer lifetime value. For wedding photography, this would be the profit you make per wedding. We want profit here because ads need to work on top of what you are already bringing in. If you use revenue, ads may bring in more revenue, but that may create a greater loss for you.
After that, we look at the cost per click. For Google Search Ads, one of the benefits is that you only pay per click, making it the key metric for determining how much you will pay for your ads. Here we assume a CPC of $5.00.
Each click will direct you to a landing page. So, how that landing page converts those clicks into leads is an important metric. Generally, a 10% conversion rate is considered decent, so that is what we used here.
Dividing the CPC by the conversion rate will give you the Cost Per Lead. In this case, we would be looking at $5 / 0.1 = $50 per lead. $50 is the cost of each lead that comes into your business. The advantage of Google Search Ads is that these leads are individuals actively seeking your services. You know this because you set up the search terms for where your ads are showing. They came across your site and then decided to contact you, so they are pretty far down the sales funnel and are probably reasonably motivated to make a purchase.
Now it is up to you to make a sale. You have the lead - book them into a consultation and see if you can close the sale on your services. In our spreadsheet, we assume a conversion rate of 30% but this is going to be highly specific. It will probably start lower and then improve over time as you become more accustomed to making sales.
We can now take the cost per lead and divide it by the conversion rate to get a price per acquired client ($50 / 0.3 in our spreadsheet), which gives a Cost per Acquired Client of $166.67.
A Cost per Acquired Client of $166.67 is great! Our client lifetime value is $2,000, which is way more than $166.67. Extrapolating from this, if we were to allocate a total ad spend of $1,000 for the month, we would expect to gain six new clients and generate ad revenue of $12,000. Delivering a 12x Return on Ad Spend.
So How Do You Set Something Like This Up?
Well, I am glad you asked because that is what we are going to do right here. First things first:
1. Set Up A Google Ads Account
We won't go into the details of setting up an account here, but suffice it to say that you need a Google Ads account before you can begin setting up a campaign.
2. Create the campaign
We will start by creating the Ad campaign. In the top left corner is that little plus icon. You will want to click on that.
Then, it will provide you with some options. You want to click on "Campaign."
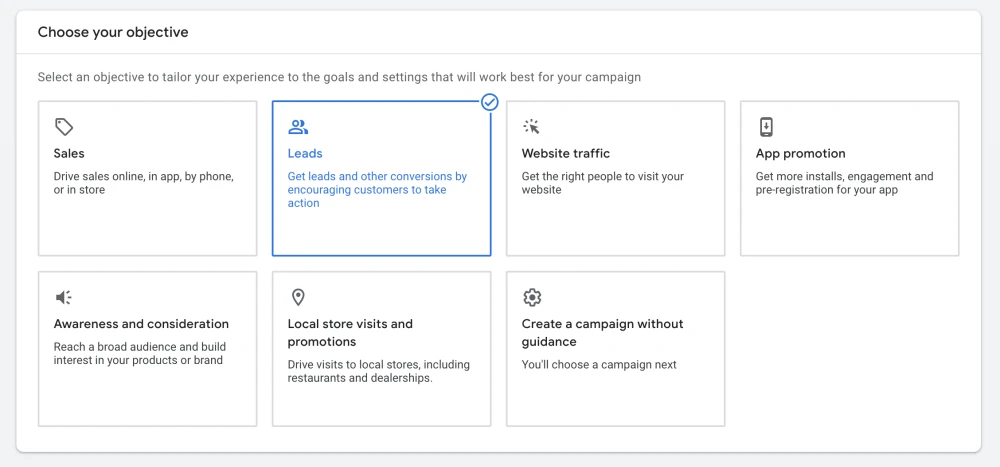
Next, Google will ask about your campaign objective. In this case, for a Photography business, you will click on leads. That is what we want here. You want leads that you can sell your services to.
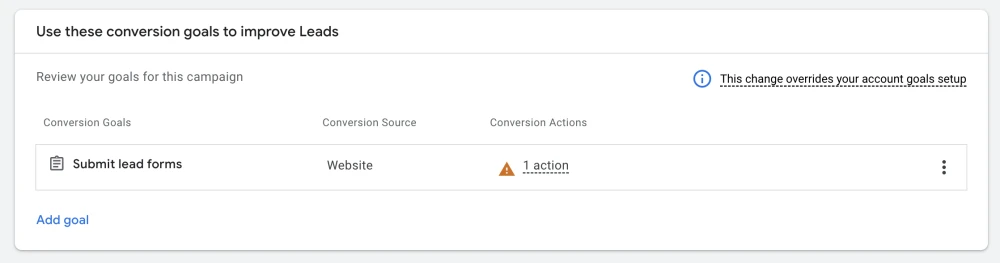
Then, Google will ask you what your conversion goal is. We will cover this in another post and return to link here once it is set up. However, in this section, you want to add a conversion goal so that Google can track this goal for you. It is nice to have the results in Google Ads, and at some point in the future, you may want to use these tracked conversions to let Google use its AI to bring in better leads. This is a topic for another day, though.
Suppose you don't have a conversion goal right now; that is okay. You can leave the default conversion goal and click continue.
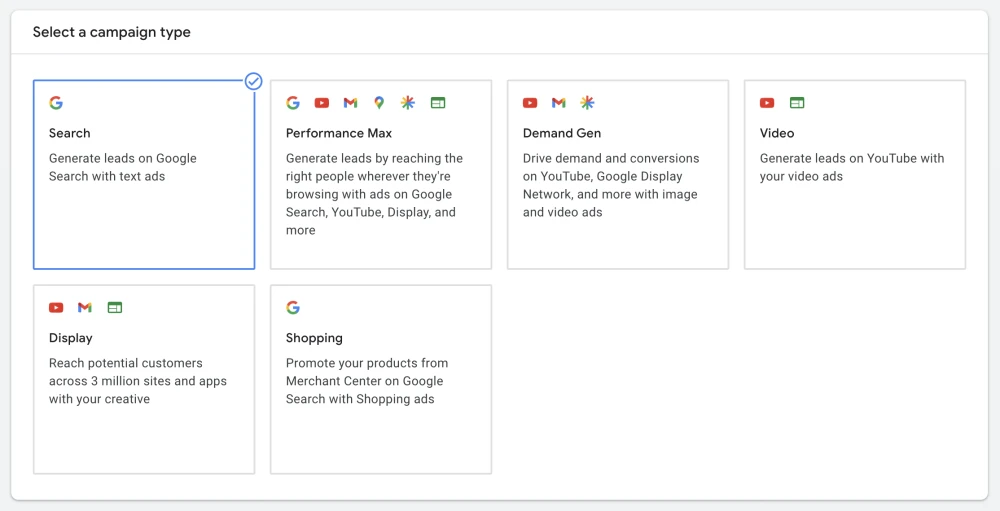
Now Google asks you to select a campaign type. In this case, we are going for search because we want to generate leads through search intent. So go ahead and click on that.
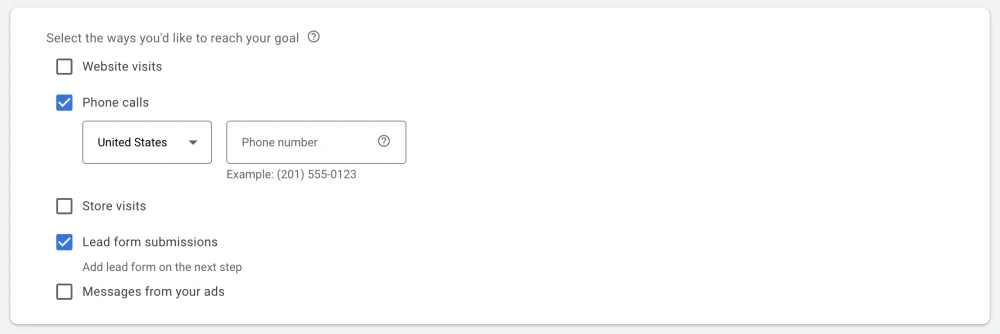
Next, we will select the actions that constitute meaningful actions for your business. For a photography business, I recommend using phone calls and Lead Form Submissions.
Finally, you will give the campaign a name - in this case, we chose "Photographer-Search," but any name that makes sense is OK.

With that, we will move into some more specific campaign settings. Remember, these can always be changed later, and some of them will be changed anyway. First up is the bidding strategy. You can select "Conversions" here. We will change this later. Conversions will, in theory, optimize bids for conversion actions. However, in a new account, we want to use manual bidding to have a bit more control. Unfortunately, Google doesn't allow us to select this option here.
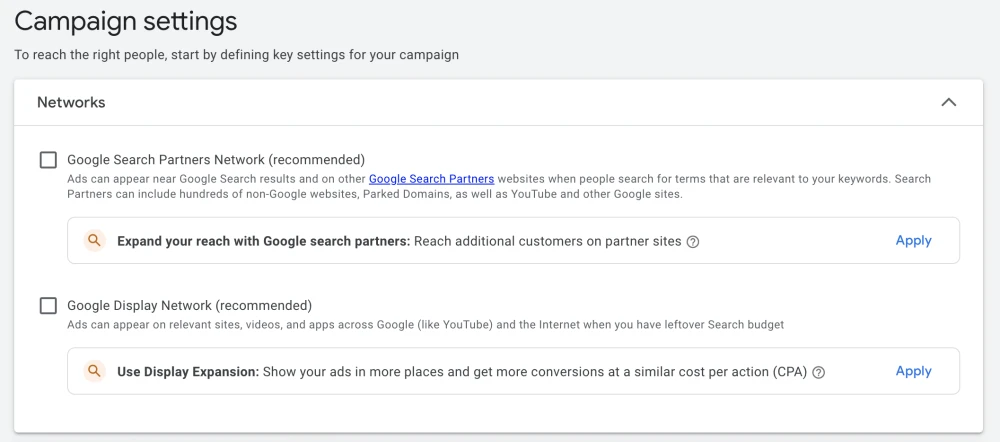
Next is the Networks. Here you will want to deselect "Google Search Partners Network (recommended)" and "Google Display Network (recommended)." These will primarily display your ads outside of search on other partner websites and across the Google ecosystem. We will keep our ads a bit more focused for this campaign.
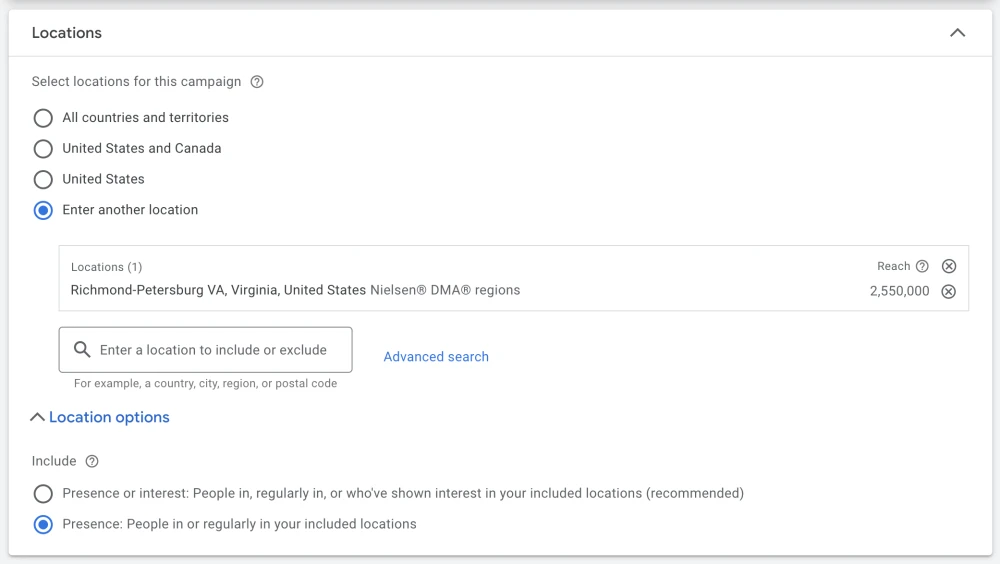
In the next block, we see locations. Locations are very important for photographers because you want to only show your ads where you are offering your services. We will revisit this later, but for now, you can select a nearby city. Then, under Location Options, choose "Presence: People in or regularly in your included locations". Now your campaign will only show ads to people physically present in that location.
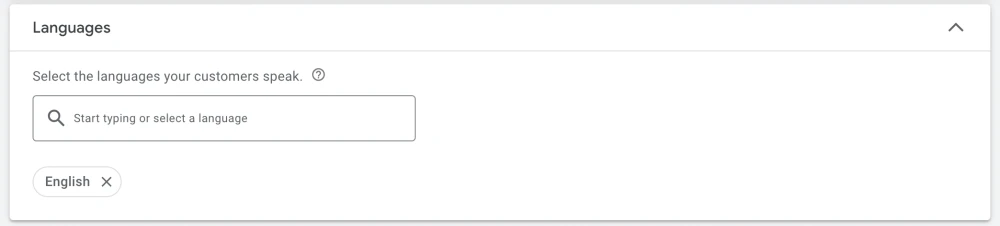
For languages, you can select the one that is most appropriate for your location.
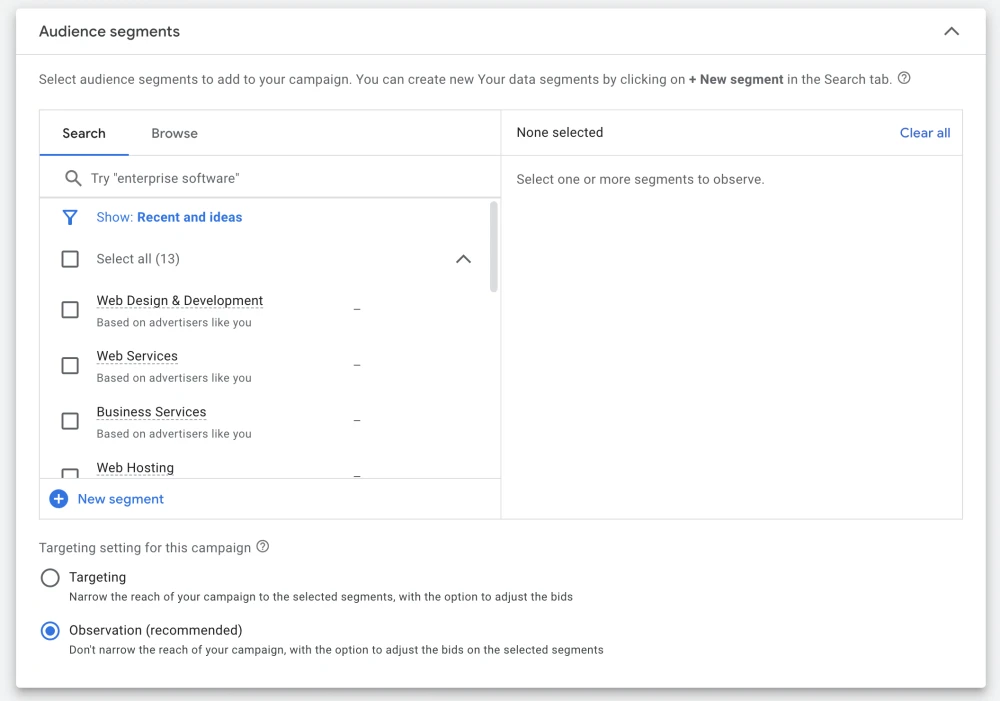
For Audience Segments, we will want to use Observation. This becomes more important if you are targeting beyond search, but for a search campaign. Observation is fine.
Now click on more settings. There are two things we want to set here—first, the ad schedule. You can leave this open all day if you want, or set up times when you will be available. I generally leave it all day and then go in and enable or disable the campaign depending on whether I will be able to get back to people.
Next is AI Max - leave this disabled for now. And click next.

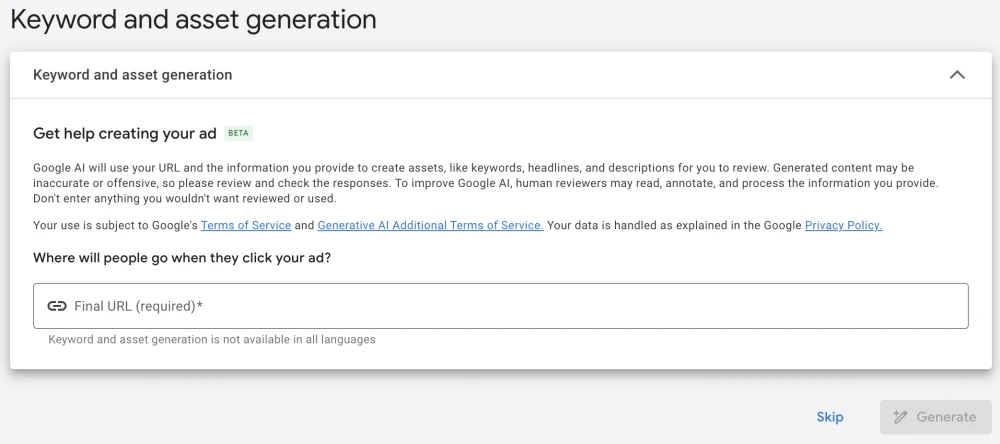
For keyword and asset generation, we also don't need to take any action here, so click 'Skip.'
Now we get to keywords. This is where things start to get a little interesting, and you will need to do some research on the best keywords for your business. We won't delve too deeply into finding the right keywords, as this topic deserves a whole post (or series of posts) of its own. For now, you will generally want to look at keywords as [service name] [location]. For example, you might want a Wedding Photographer in San Francisco or a Family Photographer in St. Louis. You will want to research these through the keyword planner, though, to be sure you are getting some with decent volumes and price points. The ultimate key is focus on the intent of the search.
3. Setting up the ad
Finally, we get to the ad itself. First, enter the landing page URL in the "Final URL" section. Then you can change the display path if you want. This will keep the same landing page but display a different URL when users view the ad. This can be helpful if you want to make the URL look specific to the search.
Headlines
Google allows you to enter up to 15 headlines, which they will mix and match when displaying your ad. You can make these up on your own, and that is fine. One effective way to generate headlines is to use the following prompt with ChatGPT: "Give me headlines no longer than 30 characters for a Google Ads ad that focuses on the following keyword: {insert keywords here}." ChatGPT will then generate a number of ideas. I have found that paying attention to each headline and ensuring they make sense together, as well as being relevant to the searched keywords, is the most important thing here.
Descriptions
For the descriptions, we do the same thing as the headlines - enter the following prompt into ChatGPT: "Give me descriptions no longer than 90 characters for a Google Ads ad that focuses on the following keyword: {insert keywords here}". You should get some nice descriptions that you can then modify to use in the advertisement.
Business Name
Just want to add your business name here. Nothing too intimidating
Business Logo
You may need to verify your business to add your logo. Once you do, please add it here.
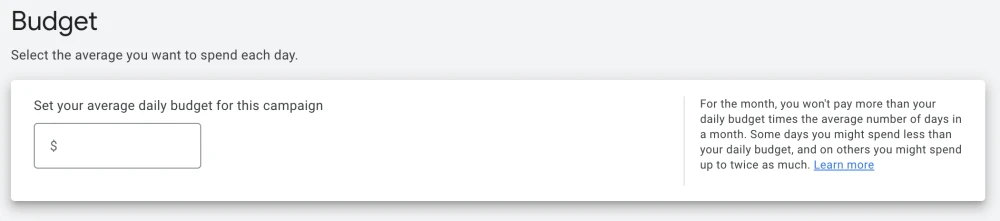
Budget
Here is where you will set up your daily budget. Set whatever you are comfortable with here. I would say that if you are under $100 / day, it can be challenging to get clicks, but starting slowly at $10-$20 is completely fine. Just realize that you will have to be patient with your strategy.
Review
Finally review your campaign and hit publish!
4. Modifications
OK, so now the ad is set up. Google will conduct its internal review, and once it passes, they will start showing the ad. As they are doing that, you will want to make a couple of modifications to the settings that we created previously. Two of them specifically we are going to change because Google doesn't allow you to make these finer adjustments when setting up the campaign. It would be nice if they allowed you to set these up as you set up the campaign, but alas...
Change the location
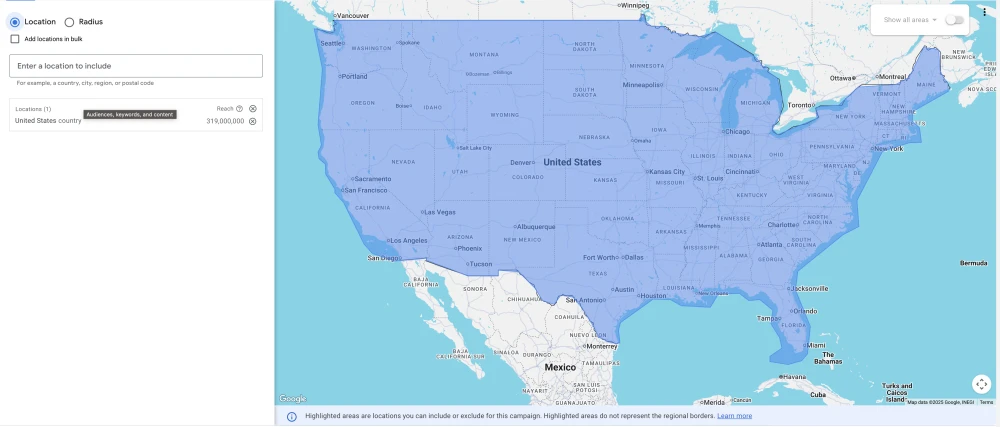
First, we want to change the location. You don't have to do this, but I like to have a radius around an area instead of a specific location. What you want to do is hover over the Campaigns button on the left side of the screen. Then, go down to "Audiences, keywords and content" and click on "Locations." You will get the following screen...
You will want to click on the "Radius" button. Now you can enter a specific location and then a radius around that location. Entering a radius around an area is particularly useful for Wedding Vendors.
Change the bidding strategy for the campaign
The last modification we want to make to the campaign is to change the bid strategy. When we set up the campaign, Google only gave us a limited selection. However, we want to change this to manual cpc. The manual mode allows us complete control over the bidding for the search ads auction, especially before you have any conversions for Google to learn from. In this case, you will want to keep this in manual mode.
To make the change, click campaigns on the far left. Then, click "Campaigns" in the expanded menu. You will see a list of campaigns. When you hover over a campaign name, a settings icon will appear. Click on that icon, and you will be taken to a settings menu that looks like this...
Next, click on "Bidding" and then select "Change Bid Strategy". From the dropdown, you can now choose Manual CPC. The dropdown will allow you to select a max cost per click for the campaign. You will want to choose something in between the minimum and maximum cost per click that is shown in your keyword research. You will need to adjust this over time to achieve the best results, but at least at this stage, you have complete control over the cost per click of the campaign.
Conclusion
And that is about it. You have successfully set up your first Google Ads campaign as a photographer. Please check back here periodically, as we will update this post with new information as it becomes available. Good luck with your business. If we can be of any help, please don't hesitate to contact us.